This tasty little recipe was originally for meatballs but somehow I could rarely find enough time to make them. So I tweaked it a lot and here is the super tasty result!
4 sprigs of fresh Rosemary
2 tsp Dijon Mustard
1 lb Ground Beef
1 Tbs dried Oregano
Sea Salt and Black Pepper
Olive Oil
Fresh Basil
1 Onion
2 cloves Garlic
2 cans of diced Tomatoes
2 Tbs Balsamic Vinegar
Spaghetti
Parmesan Cheese to sprinkle on top
1. Pick the Rosemary leaves and finely chop them (I mean really finely, they will blend right in with the meat and your kids wont even notice them, The Bug loves this recipe and she wont eat anything with visible spices on it without much whining and face making:) Mix together Rosemary, Mustard, Ground Beef, and Oregano. Add a good pinch of the Salt and Pepper.
2. Pick the Basil leaves, chop the Onion and Garlic.
3. Start the noodles!
4. Saute the Onion in the Oil, after 5 or so minutes add the Ground Beef mixture with the Garlic. Cook for 10 or so minutes then add Basil, Tomatoes, and Balsamic Vinegar. Bring to a boil then reduce heat and simmer until noodles are ready. Enjoy!
Monday, March 14, 2011
Menu Plan for 3/14/11

Its that time of the week again, check out all the great menu plans over at I'm an Organizing Junkie!
Menu Plan
Chicken Mulligatawny Stew (didn't make it last week)
Baked Radiatore with Chicken and Fontina serve with Broccoli
Rosemary Spaghetti serve with Salad and Green Beans
Surf & Turf serve with Peas and Sweet Potato Fries
Chicken Fried Rice serve with Asian Salad and Asian Mixed Veggies
Dinner with Grandparents
Turmeric-Yogurt Chicken with Tomatoes serve with Rice, Mangoes and Peas
Saturday, March 12, 2011
A New Year a New Trellis
I wish I had photos of the tomato plants from last summer. Though they never produced much fruit they managed to grow quite large and eventually pulled over 2 of the 3 cadges I had used. Thus I decided to install a new trellis system for all the wonderful trellising plants I plan to grow this year. I had a budget of $20.00 for this project and would have needed more had I not had screws, a laundry line and an extra piece of stabilizing wood on hand.
Behold the efforts of The Bug, myself and mostly my dad's handiwork!

For anyone interested, you could totally tackle this project with basic do it yourself skills, a drill, and a hammer. I found this design here, and you can see from the photos where the laundry line comes into play once there are plants :) We added a horizontal support which runs from the top of the trellis to the green fence that you can't see in this photo because of the angle. This was an afterthought as dad mentioned that it was strong enough we could hang the kids from the trellis and of course The Bug decided she wanted to try. Through rigorous kid testing we found that while surely stable enough for tomatoes it had a little more play than I was comfortable with for playground equipment so we thought up this solution. The ladder was out because we were pruning back the trees near the garden, going up and down the ladder was definitely The Bug's favorite part of the day.
Even if the plants aren't spectacular this year I will have a stylish trellis to talk about!
Monday, March 7, 2011
Balsamic Chicken with Feta Cheese
This is a super quick chicken entree to prepare, you just have to remember to put it in to marinate at lunch time!
Chicken Breasts
Balsamic Vinaigrette
2 Tbs Balsamic Vinegar
Basil
Oregano
2 Tomatoes sliced
Salt and Pepper
Feta Cheese
1. Marinate the Chicken in some Balsamic Vinaigrette for 2-3 hours. Then remove Chicken and discard marinade.
2. Preheat oven to 375 degrees F.
3. Place Chicken in baking dish and drizzle with Balsamic Vinegar. Sprinkle with Herbs, Salt and Pepper generously.
4. Bake for approximately 15 minutes or unlit cooked through.
5. Remove from oven, top Chicken with Tomatoes (I like to Salt and Pepper my Tomatoes and this point) and Feta. Broil for approximately 5 minutes or until the Cheese is lightly browned.
Homemade Pizza
This delicious Homemade Pizza Recipe is super easy and yummy, what could be better?
Homemade Pizza
1 1/4 cups very warm Water (not too hot or you will kill the Yeast!)
2 1/2 tsp SAF Instant Yeast
1 Tbs sugar
1 1/2 Tbs Oil
1/2 tsp Salt
3 cups Flour
1/2 pint Cherry Tomatoes
a few sprigs of Basil
1 clove Garlic
splash of Red Wine Vinegar
pinch of Salt
drizzle of Olive Oil
Top with whatever you like!
1. Put all the Tomato Sauce ingredients in a food processor, I use a small Cuisinart, and whiz together.
1. Pour Water in mixing bowl and sprinkle Yeast on top. Allow the Yeast to dissolve.
2. Add Sugar and watch for the bubbling as the Yeast consumes the Sugar, this may take a couple of minutes.
3. Add Salt and Oil. Gradually mix in Flour.
4. Place dough on baking sheet, I have a round pizza pan that I use. Allow dough to rise a bit, maybe 10-15 minutes. Then cook for 5-10 minutes.
5. Remove mostly cooked pizza from oven and cover with Tomato Sauce, Mozzarella Cheese, Parmesan Cheese, and whatever toppings you like. We use Pepperoni, Olives and Basil. Return pizza to oven for 5 minutes or so to cook the toppings, yum!
Menu Plan for 3/7/11

Check out all the great menu plans over at I'm an Organizing Junkie!
Menu Plan
Tuscan Bread Soup serve with EZ Wheat Bread
Church Dinner
Homemade Pizza serve with Green Beans
Chicken Mulligatawny
Chunky Ratatouille serve with Salad and EZ Wheat Bread
Dinner with Grandparents
Balsamic Chicken with Feta Cheese serve with Mixed Veggies
Saturday, March 5, 2011
Garden Stakes for Easter or Mother's Day
I love wandering around the garden in the late summer when we have family over for dinner. One of my mothers in law is a very successful gardener and she always ends up poking around my humble little patch. I wanted to make some fun garden stakes so that even if the plants turn out to be not much to look at again there will be something interesting to see and talk about.

I picked up a package of twelve stakes at the Home Depot for about $3.00. The paint and sealer was left over from another Mother's Day craft project two years ago. The Bug and I were able to paint all the stakes in about 30 minutes. The next step will be to write fun sayings on them like, "Grow Darn It!"with the Sharpies and then coat them with the sealer. The Bug really likes the green ones so I think that set might be ours. I plan on tying them together with some pretty white ribbon and a homemade by The Bug card.
EDIT***
Here is a photo of the finished stakes just in time for Easter! The stakes say "Grow Happy", "Eat Me", and "Dig Deep." The Bug wasn't interest in making 3 cards so we printed off Easter coloring pages and the kids colored them instead. Cute huh?

Planting Peas
I am a little tardy in getting this post out as we actually planted the peas two weeks ago! But here is a picture of our peas (not seen because they are planted in the ground) and the trellis the bug and I put up for them. The trellis was originally used to support honeysuckle plants which were huge so I have no doubt it can handle the peas. I also have some trellis mesh stuff that I am thinking of adding since it seems a bit open to me, thoughts?


Monday, February 28, 2011
Fettuccine with Chicken & Brussels Spouts
When my husband and I married it is safe to say that I had zero cooking skills. Well that isn't exactly true what young adult hasn't mastered Mac&Cheese?
Thus my parents gave me the Reader's Digest Great Chicken Dishes cookbook for Christmas the first year we were married. And though it took me a couple of years to use it I have found more winners that losers within it pages. Below is a little gem of a recipe I tried out this last week. Originally the recipe called for Asparagus but my asparagus had gone bad before I got around to making this. As I happened to have a bag of Brussels Sprouts in the freezer, and a mother in law on her way for dinner, Fettuccine with Chicken & Brussels Sprouts was born. Enjoy!
Fettuccine with Chicken & Brussels Sprouts
1 package frozen Brussels Sprouts
10 oz Fettuccine
1 Tbs Butter
1/2 Onion minced
3/4 lbs Chicken cut into bite sized pieces
1/2 cup Chicken Broth
1/2 cup Heavy Cream
1/2 tsp Salt
1/2 tsp dried Tarragon
1/2 tsp Black Pepper
Parmesan Cheese
1. In a large pot of boiling water cook Brussels Sprouts according to package directions, remove and rinse under cold water. In the same pot cook Fettuccine. Reserve some of the pasta water.
2. In a large skillet melt Butter over medium heat. Add Onion and cook stirring frequently, 5 minutes or so. Add Chicken and cook until mostly done.
3. Add Chicken Broth, Cream, Salt, Tarragon, and Black Pepper. Bring to a boil and cook until sauce is slightly thickened and Chicken is cooked through. Add Brussels Sprouts and 1/4 cup or so of the pasta water. Cook until heated through, 1 minute or so.
4. Transfer mixture to a large bowl, toss with pasta. Sprinkle with Parmesan Cheese.
Thursday, February 24, 2011
Minestrone Soup
Have you ever had the soup, salad, and bread sticks at The Olive Garden? My best girlfriend and I in high school used to love treating ourselves after mock trials competitions.
Well this recipe is just as tasty and much healthier! As I was totally underwhelmed with the new recipes I tried last week I thought I would post this favorite of mine. Fabulous in the slow cooker with a loaf of homemade wheat bread or dressed up with a slice of baguette and a sprinkle of shredded Parmesan. Enjoy!
Minestrone Soup
3 Tbs Olive Oil
3 cloves Garlic minced
2 Onions chopped
2 cups Celery chopped
5 Carrots sliced
4 cups Vegetable Broth
2 little cans of Tomato Sauce
1/2 cup Red Wine
1 can Kidney Beans
2 package frozen Green Beans
1 package frozen Spinach
3 Zucchini chopped
2 tsp Oregano
1 Tbs Basil
Salt and Pepper to taste
1 package Seashell Pasta
Parmesan Cheese for topping
1. In a large stock pot saute Garlic and Onion until just changing color, add Celery and Carrots and saute for 2-3 minutes.
2. Add Chicken Broth and Tomato Sauce, bring to boil. Add remaining ingredients and simmer for at least 30 minutes, the longer the better! I usually let it go at least an hour if not more, I like my soup veggies quite soft.
3. Cook the Seashell Pasta.
4. Add 1/4 cup or so of Pasta to each bowl, cover with soup and sprinkle with Parmesan Cheese. Enjoy!
Tuesday, February 22, 2011
Menu Plan for 2/21/11

I have belatedly add my name to the Menu Plan Monday list at I'm An Organizing Junkie, check it out!
Menu Plan
Mexican Chicken Soup serve with Mixed Veggies
Fettuccine with Chicken & Asparagus serve with Green Beans
Chicken, Corn & Broccoli Skillet serve with Corn Bread
(Easy) Peanut Butter Chicken serve with Green Beans
Chicken Noodle Casserole
Church Dinner
Dinner with the Grandparents
Meatballs & Pasta serve with Peas
You may have spotted a flaw in my menu plan for this week, eight dinners! I totally spaced that this weekend is our Young Families Dinner at church. No problem the meatballs can be prepared and frozen for another day. Do you ever have those days where nothing is going to get made for dinner unless you can pull it out of the freezer?
Sunday, February 20, 2011
Transplanting Seedlings and Other Lessons Learned
I may have mentioned once or twice that I am an amateur gardener. Therefore, please do not laugh too hard when I admit that this is the first year I have successfully transplanted any of my seedlings out of the starting cells into something larger.
Behold the photographic evidence of my success!


Of the plants I started from seeds this year 2 types of Leeks, 2 types of Onions, 3 types of Tomatoes, Basil, 2 types of Peppers, and Tomatillos everything sprouted, yeah! The tomatoes seem to be really healthy and happy little plants so they got transplanted first. I ended up with 10 Brandywine plants, 10 Matt's Wild plants, and 6 Glacier Salad plants. Lesson learned, don't start too many seeds!!! Of the 24 seedlings I had for each variety I culled them down to these little lovelies. I have no room for all these plants in the garden and am hoping to give them away.
Second lesson realized this week: starting leeks and onions inside is just silly. They take up space and require weeks under the lights and in the end I won't get that many plants for my efforts. Thus I am dreaming up some sort of cold frame system for the newly emptied flower bed in front of the house, more info and photos to come!
Monday, February 14, 2011
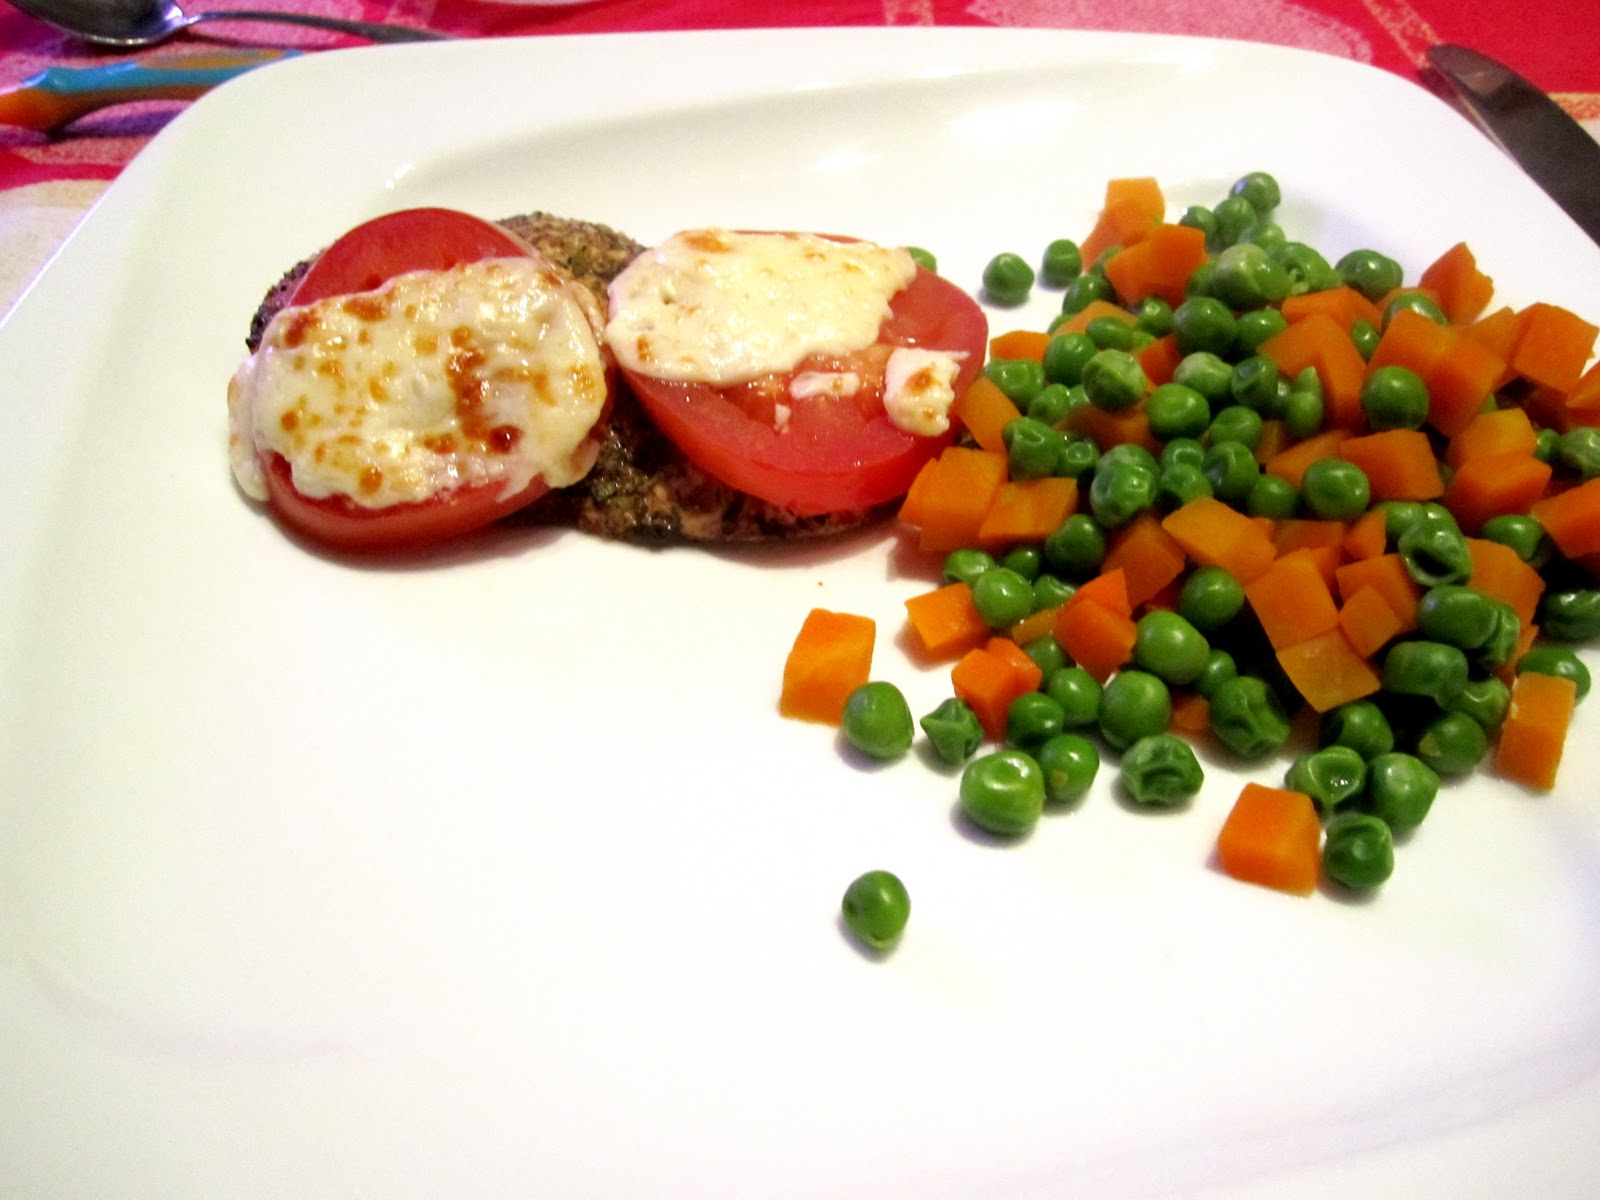
Surf & Turf
This recipe came from Jamie's Food Revolution cookbook. I really like this cookbook. I will admit that I liked it so much when I borrowed it from the library that I purchased it. I have only purchased three cookbooks for myself ever. I usually borrow them from the library and photocopy the recipes I would use again. Thus many of my Menu Plan items do not have recipe links as they are in my pink recipe binder.
I am not a huge fan of cooking fish. I really enjoy eating delicious fish I just can't get excited about cooking it. Aside from grilling salmon on the barbecue once or twice a summer this is the only fish meal I prepare. Enjoy!
Surf & Turf
4 sprigs of fresh Rosemary
Olive Oil
Sea Salt and Black Pepper
2 Chunky Cod Fillets
8 slices of Smoked Bacon
1 Lemon
Preheat oven to 475 degrees F.
Pick the leaves from 2 of the Rosemary sprigs and finely chop. Drizzle Rosemary with Olive Oil and sprinkle with Sea Salt and Pepper. Roll Cod Fillets around in the Rosemary mixture until evenly coated. Lay half your Smoked Bacon slices on a cutting board, place 1 Cod Fillet across them, and wrap the Smoked Bacon around it. Repeat with the other Cod Fillet and Smoked Bacon slices.
Drizzle Olive Oil on a baking sheet and smear around to coat. Place Cod Fillets on baking sheet and top with a Rosemary Sprig.
Bake for 15-20 minutes until the Smoked Bacon is crisp and the Cod Fillets are cooked through.
Menu Plan for 2/14/2011

Here is my Menu Plan for the week. I have added my name to the list over at I'm an Organizing Junkie, check out all the great recipe ideas!
Also, I thought I should add that I cook whichever recipe I feel like each day so these are in no particular order.
Chicken & Leek Stroganoff Over Rice serve with Roasted Carrots
Ham and Broccoli Casserole
Turkey Noodle Soup serve with EZ Wheat Bread
Pulled Pork Sandwiches on homemade rolls serve with Coleslaw and Mixed Veggies
Skillet Ham, Cabbage, and Potatoes serve with Green Beans
Apple Walnut Chicken Salad
Dinner with the Grandparents
Tuesday, February 8, 2011
Chicken Tortilla Soup
I mentioned last post that I have been menu planning for a while now. It has been a positive change for our family. Each week I try to include at least 3 new recipes because I get really bored cooking the same meals every week and my hubby gets really tired of eating them! I would like to share the most delicious new recipe from our menu plan last week, Chicken Tortilla Soup! Enjoy!
Chicken Tortilla Soup
1 lb. cooked Chicken, shredded or cut into bite sized pieces
1 medium Yellow Onion diced
1 can diced Tomatoes
1 can Enchilada Sauce
1 can Black Beans
1 can chopped Green Chilies (little can)
2 cloves Garlic minced
2 cups water
2 cups Chicken Broth
1 tsp Cumin
1 tsp Chili Powder
1 tsp Salt
1/4 tsp Black Pepper
1 bay leaf
1 package frozen corn
Place all the ingredients in a large pot and bring to a boil, then simmer for 1-2 hours.
Alternatively, if you don’t have cooked chicken, you could put everything in a slow cooker and cook on low for 8-10 hours. Remove the chicken and shred or cut up about an hour before you want to serve. Return chicken to slow cooker.
Monday, February 7, 2011
Menu Planning to Save on Groceries

In an effort to reduce our grocery expenses I am going to participate in Menu Plan Monday. A fun and inspiring idea I stumbled onto over at I'm an Organizing Junkie. What a fun site to browse around!
Thus our planned meals for the week:
Barbecued Chicken w/ Green Bean Salad serve with yogurt
Crockpot Chicken Tacos
Homemade Pizza serve with green beans and yogurt
Swedish Meatballs serve with broccoli and veggi noodles
Surf & Turf serve with coleslaw, peas and carrots, and corn muffins
Roast Chicken with Veggies serve with homemade EZ Wheat Bread
Dinner with the Grandparents
I have been menu planning for several months now but the idea of posting this information makes me feel a little more accountable. Generally speaking I would get too overwhelmed with it all once a week and we would go out to eat. Thus wasting that food and spending an additional $120.00 or so a month. We have decided to try and drop that bad habit. I will let you know how it goes :)
Thursday, February 3, 2011
First Gardening Lesson Learned for the Year
I was hoping to be able to post about my beautiful baby leeks last week and the wonderful inexpensive seed pots I was using.
Dixie Cups! Like the ones you used in your bathroom for rinsing your mouth when you were a kid, no? Me neither, my parents never would have spent money on something like that! Anyway, this blog post I found on the Internet made it sound like such a good idea I thought I would give it a try as I would have had to purchase new peat/plastic pots but just happened to have a stash of Dixie Cups my mother found at a thrift store on hand.
In went the seeds on January 23, 2011 and not even a week later I had beautiful baby leeks poking their cute little stems out of the potting soil. Lilybug was so excited and so was I. Upon seeing our first little shoots I removed the seed tray lid as you are supposed to and was disappointed to find mold. Fuzzy white mold coating the sides of the cups and even spreading into the starting mix on some.
I gathered up the little starts for the garbage with a heavy heart, the Bug thought I was going to take them out to the garden :( Lesson learned DO NOT use Dixie Cups!
So we invested in a new seed tray from the local Walmart for $5.00 and here it is complete with new leek seeds.

Hopefully next week I will have new plants to post photos of :)
Wednesday, January 12, 2011
Seeds! Seeds! Glorious Seeds!
Look what came in the mail today!

I am an amature gardener, heavy on the amature. Each year that we have owned our home I have had a kitchen garden and each year I have learned a lot about gardening, our food supply and patience! I love gardening, my husband is thankfully amused by my not so green thumb and continues to encourage and support me. This year (like every other) I anticipate learning lots more and hopefully producing more food than last year.
I read a really informative and inspirational book this winter called The Vegetable Gardner's Bible. I was particularly excited by the idea of moving away from row planting as I do not have a lot of garden space. I had looked into Square Foot Gardening before but was turned off by the seemingly high costs associated with this method (building boxes and making Mel's Mix in particular.) I am therefore attempting a happy medium of the two this year which I hope will yield lots of tasty veggies for my family to eat :)
I found a really great website with lots of helpful information on gardening called My Square Foot Garden. The author emphasizes planning as being key to a successful garden and with her fabulous tutorial I was able to create my garden plan for 2011!


I let the Bug choose which veggies we will grow in our garden this year with only a little gentle guidance from mom. She was so excited to help plant, weed and water the garden last year it was wonderful! My mother-in-law has graciously offered to help plan and install a drip irrigation system for us but I think that would ruin some of the fun for the Bug and I like the necessity of visiting the garden to water as it gives me lots of opportunities to poke around and admire my plants :)
Thursday, January 6, 2011
Chewy Chocolate Chip, Oatmeal, and Raisin Cookies
Do you ever long for summer in the dead of winter? I sure do! We had my parents over for a little barbeque in winter this evening; hamburgers on the grill, a big green salad, and these tasty cookies for desert. I love that these cookies have the perfect blend of crisp on the outside and chewy on the inside.

I try to use whole wheat flour as much as possible in the foods I prepare for my family. This cookie recipe is no exception, try it! I promise you wont taste the difference :)
Chewy Chocolate Chip, Oatmeal, and Raisin Cookies
1 cup Butter softened
1 cup Light Brown Sugar packed
1/2 cup White Sugar
2 Eggs
2 tsp Vanilla Extract
1 3/4 cups Whole Wheat Flour
2 tsp Baking Soda
1/2 tsp Salt
3 cups Oats
1 cup Raisins
2 cups Chocolate Chips
1. In a large mixing bowl cream together Butter and Sugars until smooth. Don't rush this step, blend well!
2. Beat in Eggs then stir in Vanilla.
3. Combine Flour, Baking Soda, and Salt in a separate bowl then add to creamed mixture. Mix until just blended.
4. Mix in Oats, Raisins, and Chocolate Chips.
5. Refrigerate dough for at least 1 hour. Do not skip this step or your cookies will spread and you will loose the chewy inside!
6. Drop small balls onto greased cookie sheet and gently press to flatten top.
7. Bake for 10 minutes at 350 degrees F. Delicious hot from the oven with a big glass of milk!
I made just one cookie sheet worth for our dinner this evening and will bake up the rest tomorrow. Of the nine cookies that came out of the oven the one pictured above was all that remained. Maybe I'll go finish it off now...Yum!
Saturday, January 1, 2011
Twirly Christmas Dress
I whipped this dress together during two episodes of Battlestar Galactica.

My mom bought the white onesie at a thrift store for $1.00 in October for my son. It was comically huge on him and as the bug is potty trained crotch snaps are a no-no. I put it away thinking I could cut off the snaps and use it to make into a dress. I hadn't fallen in love with any fabric yet when my mom brought 4 yards of Christmas pattern over in December. And thus the Twirly Christmas Dress idea was born.

Pretty cute huh? I think next time I would add a sash and bow to gather it closer to her hips.
Subscribe to:
Comments (Atom)